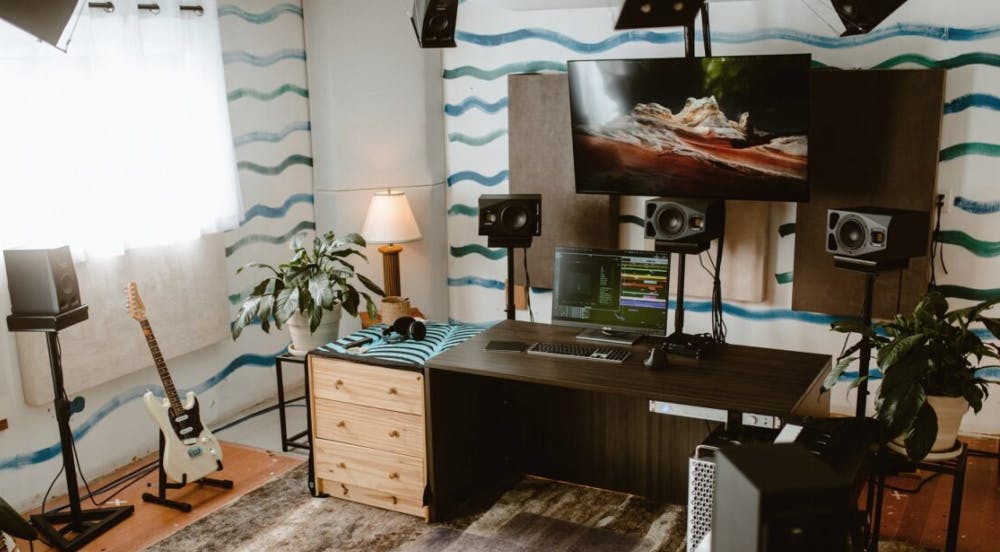
In the first article in this series, we covered the planning and physical setup of an Atmos playback system. In this second part, we’ll guide you through calibrating and fine-tuning the setup. Our focus remains on the popular 7.1.4 Atmos speaker configuration, as well as on headphones. Achieving accurate mix translation is one of our primary goals, and by following this guide, you’ll help ensure your room meets Dolby’s recommended specifications.
We are adhering to Dolby’s best practices document for setting up music mixing rooms. Try your best to follow these guidelines closely, and then during calibration and critical listening, you can make small adjustments to tailor the setup to your specific studio and your desired outcome.
Calibrating monitors for Atmos
Mixing for Atmos requires that your speakers meet specific loudness and frequency balance standards. These standards ensure compatibility with a wide range of playback systems, making proper setup and calibration of an immersive mix room crucial. Most of us are familiar with the setup and calibration concepts for stereo monitors, so now we’ll expand that concept to cover the twelve speakers in a 7.1.4 system.
The goals for calibration are simple. Each speaker should produce the same volume and have a flat frequency response when measured from the listening position, and sound from all speakers should reach the listening position at the same time. Speaker calibration can be achieved through manual measurements and calibration, or by using measurement software that generates a calibration profile.
I strongly recommend Sonarworks SoundID Measure for Multichannel to measure and calibrate an immersive setup. SoundID guides you through the measurement process and generates a calibration file that can be directly imported into many monitor controllers, interfaces, and even some speakers. For devices that aren’t directly compatible with SoundID, it can export EQ and delay calibration data that can be manually entered into the DSP of your interface or monitor controller. Additionally, the SoundID Multichannel plugin can run in any DAW or in the Sphere monitor control software from Ginger Audio. SoundID simplifies room measurement and calibration, saving hours of work. While there are other professional room measurement tools that work with specific speakers and monitor controllers, they are often significantly more expensive than SoundID.
If you choose to calibrate your speaker system manually, you’ll need to measure each speaker’s timing, frequency response, and volume using a calibrated measurement microphone with software like Room EQ Wizard (REW). REW generates EQ, timing, and trim settings each speaker channel, which must then be manually entered into the DSP of your interface or monitor controller.
REW is a free tool, though there are paid alternatives like SMAART. However, all of these programs have a steep learning curve. If this is your first time setting up and calibrating a room, it may be worthwhile to hire an expert, which typically costs between $400 and $1,000—a worthwhile investment for a professional calibration and a great learning experience.
Frequency Response. What is Flat for Atmos?
Calibrating the frequency response of stereo playback systems is a well-discussed topic. We know that while most speakers can produce a flat frequency response in ideal conditions, they don’t do so when placed in a room. As a result, speakers often require some tuning with an equalizer to ensure their “in-room” frequency response matches the desired curve. But what exactly is that curve?
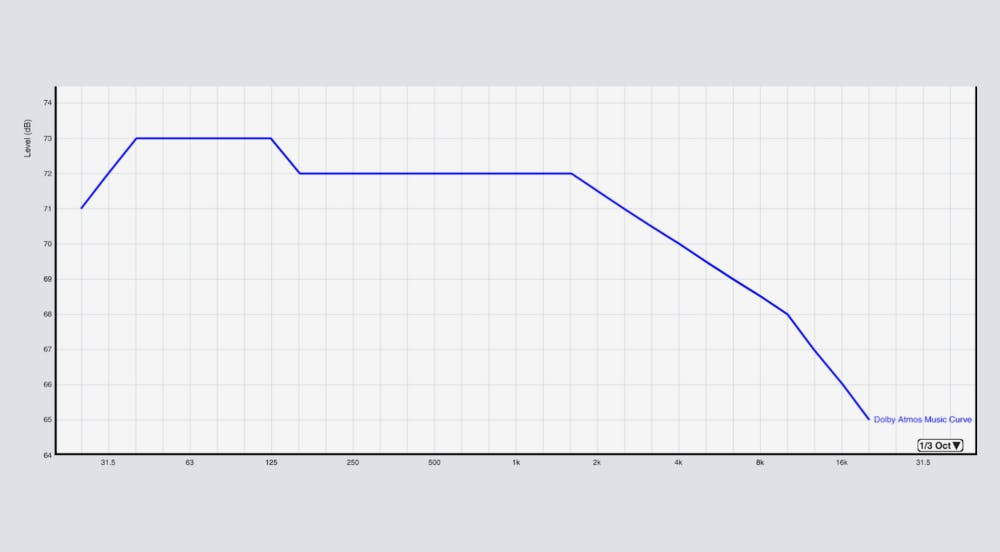
Dolby, in collaboration with major label partners, has agreed on the Dolby Atmos Music target EQ curve that ensures optimal translation across Atmos playback systems. This curve is similar to the Harman target curve with some minor tweaks (see image below). You should start by tuning your room to this curve, but if you prefer a slightly different response, that’s acceptable as long as your mixes translate well to other listening environments. When you begin mixing in Atmos, it’s essential to bring your mixes to other studios to hear how they translate. You can then refine your speaker response curve, if needed, to ensure consistency across various spaces. SoundID Reference provides target settings for flat, the Dolby Atmos Target curve, and custom user adjustments to the calibrated EQ curve.

Placing the Speakers and Acoustic Treatment
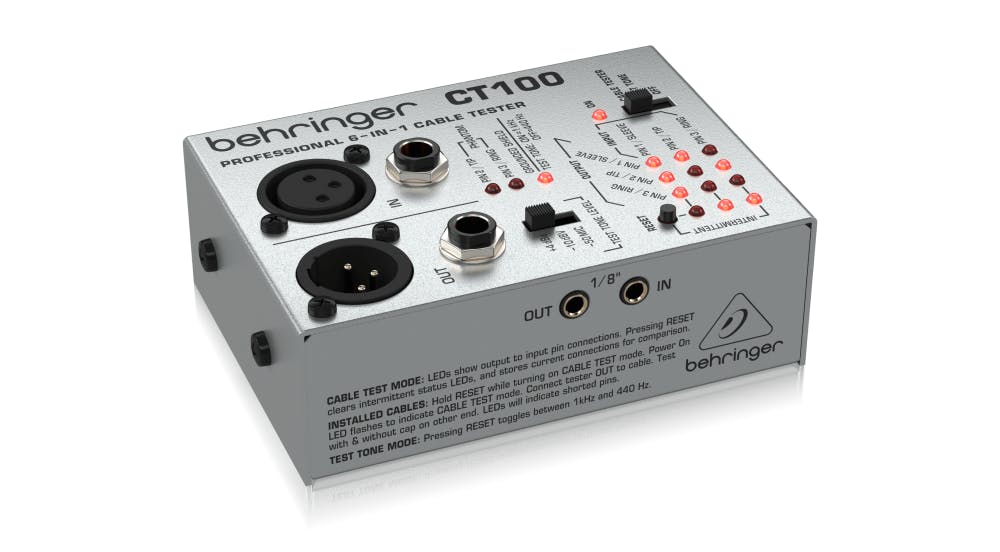
In the previous article, we defined the speaker locations for all of our monitors, and it’s important to review and verify that information before tuning your room. Similarly, acoustic treatment should be designed and installed with an immersive speaker setup in mind to minimize unwanted reflections and boundary interference. Additionally, you should verify that all your speakers produce signals with the same polarity. Phase checking requires some special equipment and expertise, but if your equipment is new and all speakers and amps are from the same manufacturer, you can generally assume that they will maintain the same polarity. You should, however, verify that all your cabling and patches maintain the proper polarity. Cables and connections can easily be checked using an affordable $20 cable tester, like the Behringer CT100.

The Measurement Process
Setting up and calibrating an Atmos system requires organization and a systematic approach, so let’s go through the steps. We’ll assume that the surround speakers have been placed on stands in their proper position, the overhead speakers have been securely mounted to the ceiling or other supports, and the subwoofer (LFE speaker) has been placed in an appropriate location.
Now let’s aim the speakers. Generally, speakers have a wide horizontal dispersion angle (90˚-120˚) and a narrower vertical dispersion (40˚-60˚). For stereo monitors, this dispersion helps maintain a wide sweet spot for lateral movement and minimizes reflections from the desk and ceiling. For surround speakers placed around the listening area, it’s important to take care when orienting and aiming them (and to consult the manual), ensuring they evenly cover the listening area. This area should encompass at least two seats at the mix position.
Check The Outputs
Once the speakers are properly aimed, it’s important to test that your system sends signals to the speakers in the correct order. To check speaker order, you can insert a signal generator on a DAW track and route its output to each speaker one at a time. Make sure the output order matches your expectations. For example, the SMPTE standard channel order for a 7.1.4 system is L, R, C, Lfe, Ls, Rs, Lrs, Rrs, Ltf, Ltr, Rtf, Rtr.
If you are using the Dolby Renderer application, you can confirm that each output is assigned to the correct speaker in the Room setup > Routing page. Then, use the Renderer > Speaker Calibration window to play a test signal to each speaker for further verification. As a final check for the system audio on a Mac, you can use Apple Music to play the “Dolby Atmos Channel ID 7.1.4 Functional Test.” https://music.apple.com/us/album/dolby-atmos-channel-id-7-1-4-ltf-rtf-ltr-rtr/1608035851?i=1608036078.
Calibrate Speaker Volume
Now that audio is playing through each speaker, begin the calibration process by matching the output volume of all the speakers. The easiest way to do this is by playing filtered pink noise through each speaker and measuring the sound pressure level (SPL) with an SPL meter positioned at the listening point. Using pink noise filtered with a high-pass filter at 350 Hz and a low-pass filter at 2.5 kHz allows for more consistent loudness measurements on an SPL meter. You may use a proper SPL meter or even an phone app, like the free NIOSH Sound Level Meter, for consistent measurements.
Start by playing filtered pink noise through the front left speaker and adjust the monitor level to about 77 dB SPL (or 85 dB SPL for large rooms). Then, repeat this process for the front right speaker, center, left surround, and so on. The LFE subwoofer should measure about 5.5 dB louder than the other speakers when playing pink noise low-pass filtered at 125 Hz. If a speaker’s volume deviates by more than a dB or two, adjust its level using the speaker’s sensitivity control or the power amplifier feeding the speaker. These initial volume adjustments will make the final calibration process easier and more accurate.
Take Measurements
We can move on to measuring each speaker’s frequency response and timing. As previously mentioned, I recommend using SoundID Measure for this process, as it guides you through the measurements and generates a calibration file. This file can be used in the SoundID Reference plugin or the calibration data can be exported and either automatically or manually loaded into your room calibration DSP device. At this time SoundID can export calibrations to devices from ADAM, Avid, Audient, DAD, Dolby, Fluid, Lynx, Merging Technologies, RME, and Wayne Jones, with the list continuing to grow.
If you prefer to use measurement software like Room EQ Wizard, you’ll need to measure each speaker’s frequency response and timing, and then generate an EQ and delay setting that can be applied by your monitor controller. Some monitor controllers offer 10-band equalizers, while others provide more EQ options. Some monitor controllers offer 10-band equalizers, while others provide more extensive EQ options. For example, the Audient Oria provides a 20-band EQ, delay adjustments down to 1/100 ms, ± 6 dB trim, and crossover control.
The Final Test
After you’ve measured and applied calibration, take some time to listen to Atmos music. This is when you’ll truly appreciate all your hard work and start to understand how your system sounds, as well as whether any tweaks are needed. For example, in small rooms, I often find that the left and right surround speakers feel a bit too loud by a couple of dB, so I may trim their levels slightly. I make these adjustments based on having heard the same source material in many different setups, and these small tweaks can help ensure better translation across different rooms. This kind of fine-tuning comes with experience, so it’s a good idea to consult an expert to help finalize your setup.
Atmos on Headphones
Referencing an Atmos mix on headphones can be tricky due to two competing standards. On one hand, Dolby generates a binaural headphone mix that folds the immersive elements down to stereo while applying ambience to certain objects in the mix based on definitions made during mixing. On the other hand, Apple Music bypasses Dolby’s binaural mix and instead creates what is referred to as Apple Spatial Audio. We can only guess which version our audience will hear when listening on headphones, so a good idea to audition both formats to ensure the best possible experience.
To audition the Dolby binaural playback, you can use the Dolby Atmos Renderer app or your DAW to re-render the mix in real-time and send the headphone version to a stereo output from your interface. This output should only be listened to on headphones.
To audition the Apple Spatial Audio version of a mix, you’ll need a decoder that replicates Apple’s processing. The two most reliable options are the Audiomovers Binaural Renderer for Apple Spatial Audio (subscription-based) and Ginger Audio’s iRender Spatial plugin utility, included with their Sphere software monitor controller (iRender is free with the software purchase).
Users of the latest versions of Logic Pro can audition Apple Spatial Audio directly within Logic. Alternatively, the Dolby Renderer app can export an Atmos master (.ADM file) as an MP4, which can be played on an iOS device with Apple Spatial Audio enabled.
Professional mixers offer differing opinions on the importance of referencing Atmos on speakers versus Dolby binaural versus Apple Spatial Audio. The headphone downmix algorithms for Atmos have improved significantly in recent years, so we can be increasingly confident that speaker mixes will be more accurately reflected on headphones over time.
In my view, the speaker mix should be the primary reference,while the headphone mixes should be auditioned to ensure that the overall intention of the mix does not substantially change between headphones and speakers. As of today, more than 90% of listeners experience immersive mixes on headphones, but more cars, smart speakers, and soundbars are supporting Atmos speaker playback every day. This trend is likely to continue, and in the near future, headphones will likely offer convincing spatial playback through personalized HRTF (Head-Related Transfer Function) translations.
Conclusion and Takeaways
By following the guidelines outlined in this article, from fine-tuning speaker levels to ensuring accurate frequency response and timing, your immersive mixes will stand up to the demands of both professional environments and consumer experiences.
- Precise Calibration is Essential: Proper setup and calibration of an Atmos system, particularly in a 7.1.4 speaker configuration, are crucial to achieving accurate mix translation across various playback systems.
- Speaker Placement and Tuning Matter: Correct speaker position and acoustic treatment ensure optimal sound coverage in the listening area.
- Volume Matching for Consistency: Calibrating speaker levels ensures consistent output across all speakers, which is critical for immersive audio environments.
- Frequency Response Adjustment: Using tools like SoundID Measure or Room EQ Wizard to measure and adjust frequency response helps ensure your room is tuned to the Dolby Music EQ curve for the best mix translation.
- Speaker vs. Headphone Reference: Although most listeners currently experience Atmos on headphones, professional mixes should be primarily referenced on speakers, with headphones used to confirm that the mix’s intent remains consistent.
- Competing Headphone Standards: It’s important to audition both Dolby’s binaural headphone mix and Apple’s Spatial Audio format, as they can differ, and you can’t predict which version listeners will experience.
- Future-Proofing: The growing availability of Atmos-enabled devices like cars, soundbars, and smart speakers means it’s important to future-proof your mixes for speaker-based playback.


