In parts I and II of this series on compression, we covered traditional stereo compression and multiband compression for mastering or master bus applications. As a reminder, we are going for transparent control to “glue” a mix together, to make the mix cohesive and punchy and bring up some interesting details and depth. This article will present another option for stereo mix compression that offers unique possibilities and may just scratch-an-itch for certain people. As with everything in audio production, opening your mind to a new process will push you to experiment and develop new methods.
Middle vs. Side
To be brief, the mid of an audio stream consists of all the elements that are the same in both the left and right channels—center panned information, and to some extent things that are not panned completely to one side or the other. The side information contains elements that are unique to only the right or left channel. Many digital processors, and some analog processors, can decode these two streams out of a stereo mix, allow independent processing of the mid and side streams and then recombine those two streams back into a stereo mix again. It works, and it’s not magic.

Stereo Considerations
Before jumping into the details of mid-side compression, let’s spend a moment on stereo linked compression vs. non-linked compression. When compressing a master with a traditional stereo compressor, we typically use moderate compression, which won’t do a whole lot to change the stereo image of our mix. With more aggressive time constants and harder compression, an unlinked compressor may produce different dynamic changes in each channel which may cause the stereo image to wander a bit or become unstable. Linking the compressors left and right sidechains maintains a stable stereo image, but unlinking the left and right channels, even with gentle compression, often produces a subtle increase in stereo width. I’ll let you decide if that’s good or bad.
In the case of mid-side compression, we are compressing the mono information with one channel of a compressor and both the left and right sides with the other channel of the compressor. This method retains the stability of left-right stereo imaging. However, since we are ultimately adjusting the dynamics of the center of the mix against the dynamics of the sides of the mix, we have an opportunity to change the overall stereo perspective from less wide (louder mid channel) to wider stereo (louder sides channel). I would generally recommend starting with similar attack, release, and ratio settings both the mid and side channels—the amount of gain reduction and the makeup gain for each path are the important considerations.

Reasons for Using Mid-Side Compression
The main groove elements and lead vocal typically live in the mid channel, while pads, ambiences, effects, and supporting instruments live in the sides. Mid-side compression, therefore, gives us a chance to control the dynamics of the groove and/or vocal without affecting the clarity and dynamics of the stereo elements and vice-versa.
By manipulating the mid channel, we have the ability to enhance the dynamics of the groove, the punch of the kick, or the presence of the snare or lead vocal. Conversely, we can increase the clarity of the details on the sides, which may add rhythm, ambience, and depth to a mix. As a bonus, mid-side compressors provide gain for each channel, so even without any compression, we have level control of the center vs. the sides—an effective stereo-width tool in its own right.
Many people get by fine without using mid-side compression, or multiband compression, but you should do yourself a favor and try mid-side on a few projects to see where this tool fits into your arsenal. Unlike multiband compression, you’re less likely to destroy a good mix with mid-side compression, just be sensitive to the size of the mix and you’ll be fine.
In Practice
Let’s take a look at some typical problems encountered during mastering and how mid-side compression can solve the problems:
- A mix where the kick (or low-end) is too loud or out of control
- A mix where the vocal is simply too loud
- An EDM mix that needs an exaggerated “pump” in the low end
- An excellent mix with some slight sibilance problems on the vocal
- A live ensemble recording that lacks ambience or depth or a sparse pop-style mix that sounds too dry
The Kick or Low-End is Loud or Too Dynamic
The 808 kick and sub-bass play an important role in hip-hop and trap records, but if those elements are too loud it’s nearly impossible to hear the vocal or get enough level out of a master. The listener is forced to turn up the volume to hear the vocal and the bass blows out the monitors. Mid-side compression can provide control to the center information, where a few dB of compression will contain the low end and maintain the size and clarity of the sides. However, if the mix contains a lot of stereo bass information a multiband compressor may be more effective.
Additionally, a little compression and make-up gain in the sides can bring up the reverb, which, especially in trap records, can add a nice sense of space to a record. For bass-heavy music, remember to use long-enough release times so that the bass doesn’t distort and slow-enough attack times so that the impact of each beat is not lost. 100mS attack and 100mS to 200mS release times are great starting points.
The Vocal or Lead Instrument is Sibilant
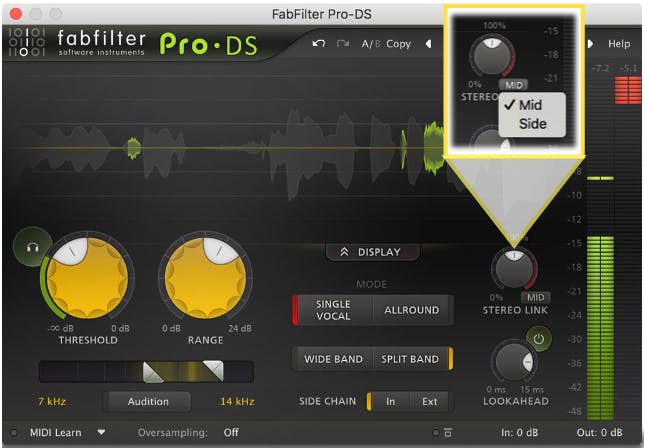
Most de-essers are dynamic processors, so why not discuss them here. When I have a harsh lead vocal in a master, mid-side de-essing provides an effective means to de-harsh the vocal without affecting the percussion and rhythm guitars in the side channels. My favorite tool for this is the FabFilter Pro•DS. This de-esser allows you to process the mid, sides, or the entire stereo mix for transparent de-essing during mastering.

Enhance the Space in a Mix
Acoustic ensemble recordings made with a stereo mic setup are great candidates for mid-side processing, as are sparse arrangements of multi-tracked songs. Compression reduces the dynamics, or difference between the loud and soft parts, so gently compressing and adding makeup gain to a master effectively brings up the low-level details in a mix. This can be used to our advantage to enhance the room sound, effects, and sense of depth in a master.
Gently compress just the sides by a couple of dB with a 100mS attack, 150mS release, and a low ratio for a couple of dBs of transparent gain reduction. Then dial in some makeup gain on the sides. Be careful not to add too much gain, but the right amount of boost will bring out the spacious qualities of the mix. If the sides contain a lot of low-frequency content, you may want to also apply a mid-side EQ to reduce the lows in the side channel.
Mid-Side Bonus Feature!
This is more of a mixing or production tip than a mastering tip, but often we are asked to emulate an effect, like a vocal treatment, from a popular record. It might be difficult to hear exactly what kind of effects are being used on a particular instrument, but one way to hear inside a stereo mix is to “unmix” the song into it’s mid and side components. I often use this technique to solo the sides of a dense mix in order to hear the stereo effects, like reverbs and delays, that are used on the lead vocal or drums. Soloing the mid channel will expose any mono effects on the lead vocal, like a slap echo or mono chorus effect.
Mid-Side Compressors Recommendations for Mastering Use
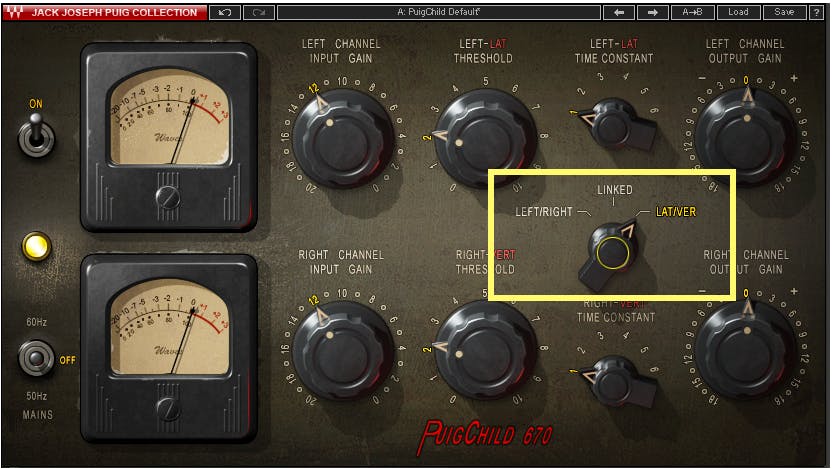
Here are some of my favorite mid-side dynamic processors. If you have a favorite processor that doesn’t provide a mid-side mode, there are mid-side matrix plugins, such as the Nugen SigMod utility, that decode the stereo signal into mid and side and provide insert options for the plugins of your choice.


